

8 PostgreSQL, often referred to as Postgres, is a powerful open-source relational database management system known for its robust features, scalability, and extensibility. Whether you are a developer, data analyst, or database administrator, installing PostgreSQL on your system is the first step to leverage its capabilities. In this guide, we will walk you through the installation process on various platforms with easy-to-follow examples.
Prerequisites
Before we start the installation, ensure that you have the following prerequisites in place:
Operating System: PostgreSQL supports a wide range of operating systems, including Windows, macOS, and Linux. Make sure you have a compatible operating system version installed on your machine.
System Requirements: PostgreSQL has specific system requirements based on your intended use and workload. Review the official PostgreSQL documentation for detailed information on system requirements: PostgreSQL Documentation
Administrative Privileges: For some installations, you might need administrative privileges (root or superuser access) on your system.
Installation Steps
Step 1: Windows Installation
Download the PostgreSQL Installer for Windows from the official website: PostgreSQL Downloads
Run the installer and follow the on-screen instructions.
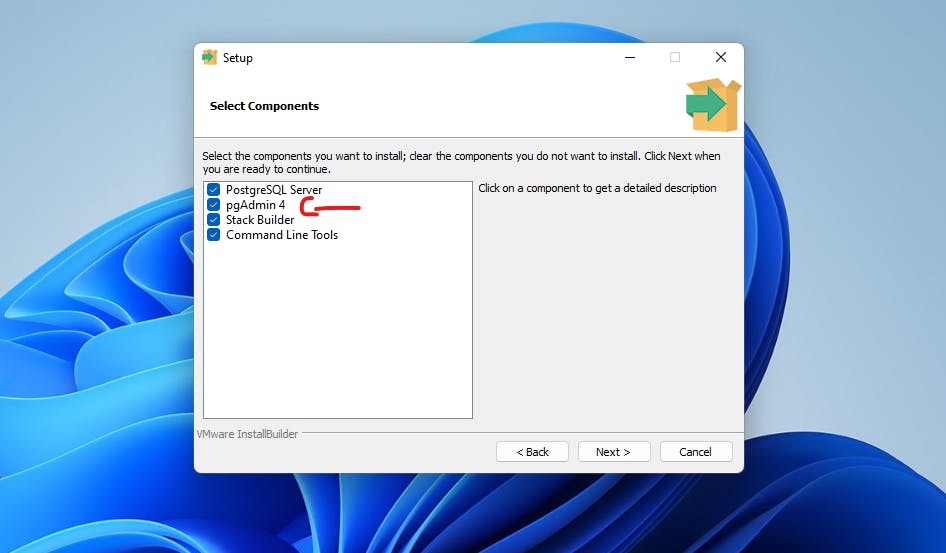
During the installation process, you will be prompted to choose the components to install. Make sure to select the "pgAdmin" tool if you want a graphical administration interface.
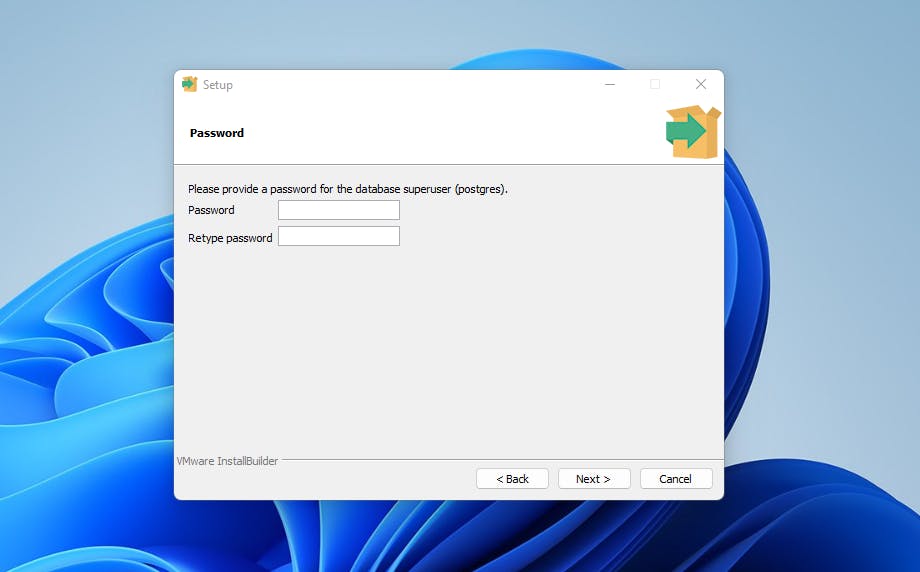
Choose a password for the database superuser (postgres) when prompted. Remember this password as you will need it later.
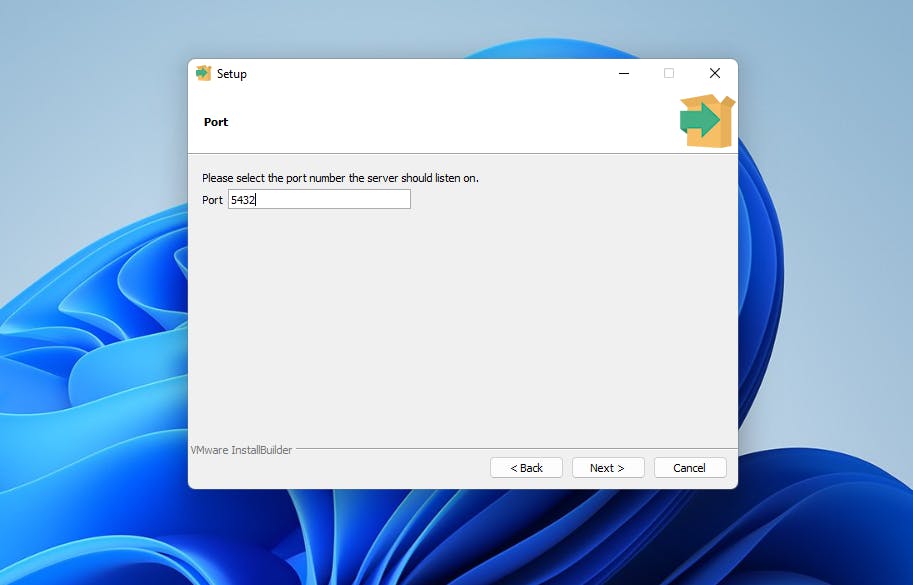
Choose the port
Complete the installation process, and PostgreSQL will be installed on your Windows machine.
Step 2: macOS Installation
PostgreSQL can be installed on macOS using Homebrew, a popular package manager for macOS. Open Terminal and run the following command:
brew install postgresqlHomebrew will handle the installation, and once the process is complete, PostgreSQL will be ready to use on your macOS system.
Step 3: Linux Installation
PostgreSQL is available in most Linux distribution repositories. To install it, open a terminal and use the package manager specific to your distribution:
For Ubuntu/Debian:
 sudo apt-get update
 sudo apt-get install postgresql
For Fedora:
sudo dnf install postgresql-serverFor CentOS/RHEL:
sudo yum install postgresql-serverOnce the installation is finished, PostgreSQL will be running as a service on your Linux machine.
Important
Now you can start the PgAdmin to control the the server/databases, but sometime on windows the default installed PgAdmin won't start correctly, to fix this issue just download it as a separate version from this link, then install it aaaaaand yes the issue will be fixed.